Contabo VPS Module installation for Blesta
Contabo VPS Automation for Blesta is a highly convenient tool for anyone looking to automate the management of their VPS servers.
This module enables your clients to remotely manage VPS status and rebuild their machines with ease. It also offers flexibility to customize your services, making it easy to meet even the most demanding client requirements.
Obtaining/Generating Datalix API
- Sign in to your Contabo Customer Panel at https://my.contabo.com/account/login.
- Navigate to the API section from the menu on the left.
- Click on Send Link within the API page to initiate the process of setting or resetting your password.
- Check your email inbox associated with your Contabo account. Follow the instructions to set your API password. Remember, your password should only include the characters '@' and '#', and no other special characters.
- After successfully setting your API password, make note of the API Password, ClientId, Client Secret, and API username provided.
Adding License & API Key
- Download extract and upload content of blesta directory into your /path-to-your-blesta-home/ directory
- Login into your Blesta Admin Portal
- Go to Settings → Modules → Available → and click on Install next to Contabo VPS module
- Go to Settings → Modules → Installed → Manage (next to Contabo VPS Module)
- Click on Add Account and provide a Name, API Key (copied from previous step).
- Fill in the API Password, ClientId, Client Secret, and API username that you obtained earlier from the "Obtaining API key from Contabo" section.
- Then click on add server
Activating plugin
- Go to Settings → Plugins → Available → and click on Install next to Contabo VPS plugin
- You can access the module addon page in Tools → Contabo Cloud
Creating/ Modifying Packages
- Now navigate (Packages → Packages → Add Package (+) sign → Give a Package and set other thing based on your requirement within Basic Tab page.
- Go to Module Tab → select Module Name: (Contabo VPS), group : Any , Account, other options ( If you know what it is else leave it )
- And do click on Update or Add Package by selecting your required plan for the package.
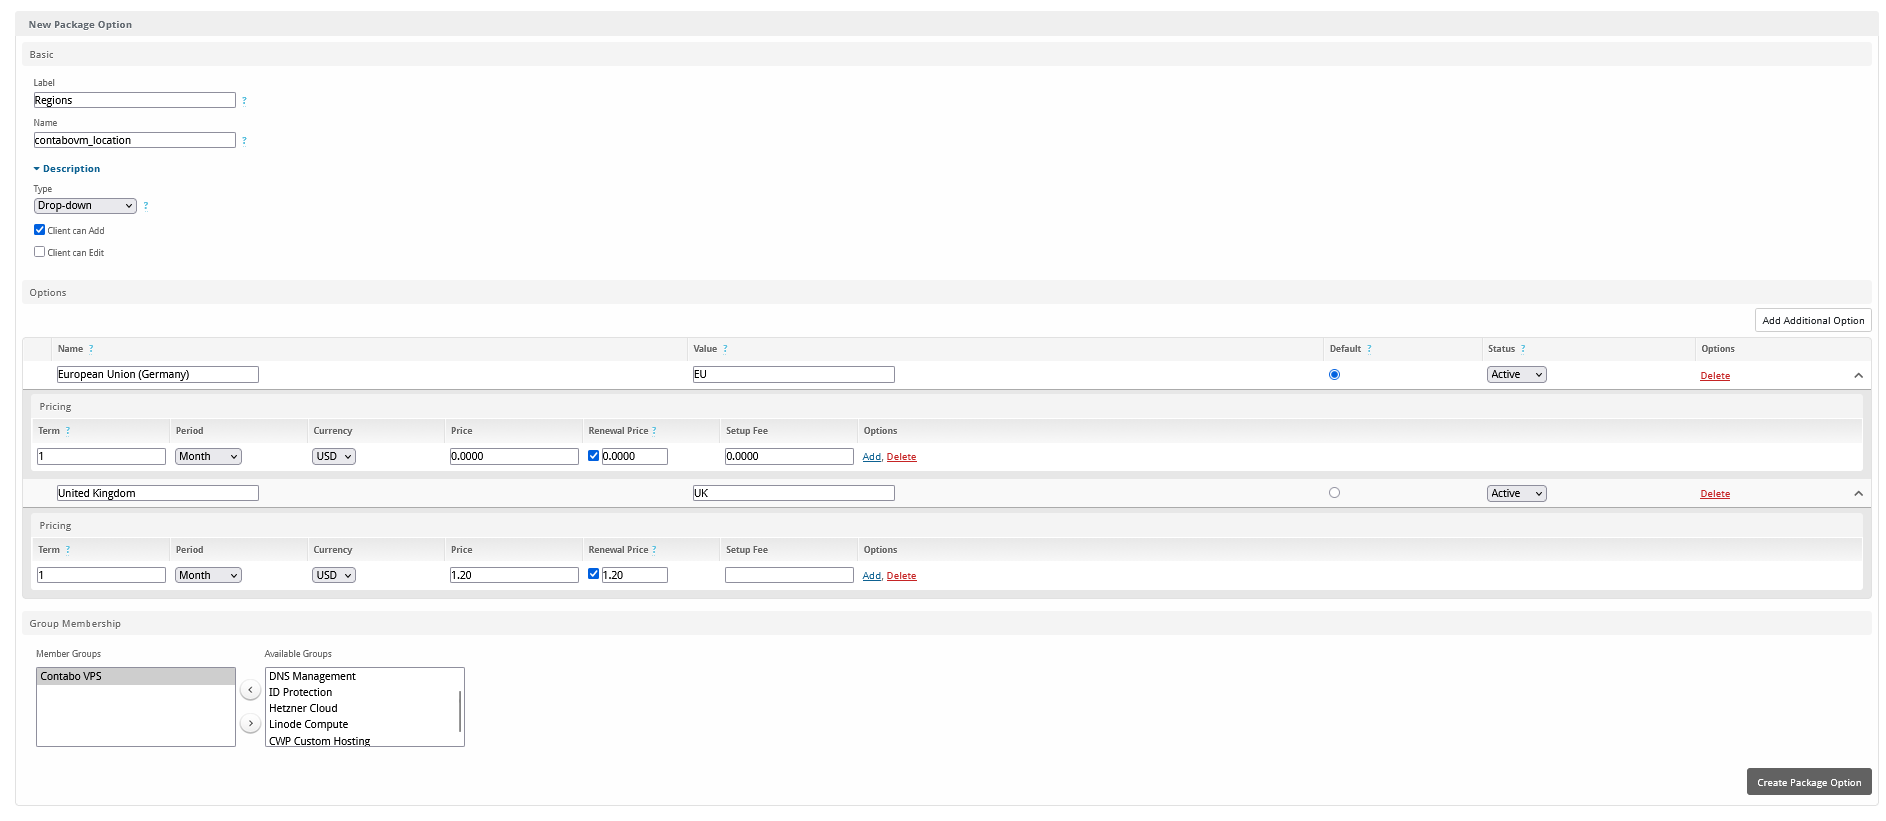
- You need to add configurable options as show below and its options you can obtain from: Tools → Contabo Cloud → Regions
Obtaining VPS Id
- Navigate to Tools → Contabo VPS
- Here you can see your already purchased VPSes and its respective informations
Importing and Assigning Existing servers to customer
- Start by navigating to your user’s profile and editing their product/ services.
- Locate the VPS ID text box within the service settings (post clicking on the manage link).
- Copy the VPS ID from your Hostinger control portal or from previous stage at Navigate to Tools → Contabo VPS.
- Paste the copied VPS ID into the VPS ID text box in our module.
- Now we have successfully installed, configured the module
Happy using!